My Store
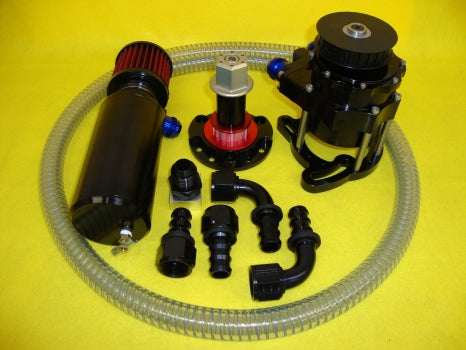
STAR MACHINE 4 V VACUUM PUMP KIT COMPLETE STR.03.01.000KW
STAR MACHINE 4 V VACUUM PUMP KIT COMPLETE STR.03.01.000KW
Couldn't load pickup availability
MOUNTING THE PUMP
NEVER MOUNT THE PUMP BY CLAMPING AROUND THE DIAMETER
Star Machine offers two different mounting brackets (STR.99.06.10 & STR.99.06.11). Both are designed to be used with front engine plates. Both brackets allow the pump to be mounted and rotated to an ideal position for plumbing. Mount the pump with the fittings facing upward. Either bracket will accommodate most applications. When using the side mounted bracket you should use all four screws to attach the Pump to the bracket. When using the rear mounting bracket you must use all four stand-off spacers supplied to adequately support the Pump. These spacers should be spaced as equally as possible. These spacers can be shortened to a minimum of 1.5" and re-tapped to #10-32 UNF. Or you can purchase in a custom length from Star Machine to provided proper belt alignment.
Once you have the correct length spacers use medium/removable thread locker on all spacer screws and the bracket mounting screws.
DRIVING THE PUMP
There are many pulley/belt tooth configurations available today. We have chosen one of the most commonly found on race cars with .50” wide x .375” (L) pitch belts and pulleys. You may use another style as long as you follow the recommended ratios.
If you chose to change the pulley on the Pump, you MUST use the pulley thrust cap delivered with your pump! This requires the use of a pulley (or pulley and spacer) with a combined hub width of .85” to .80” to ensure that the thrust cap will not bottom out on the shaft face. Use ONLY ONE set screw, directly over the key. Tighten the thrust cap first, then the set screw. Install the Pump pulley with the fins facing the Pump.
PUMP DRIVE RATIOS
A ratio of 2:1 (Pump driven at 50% of crankshaft speed) may be ideal for most dry sump applications. There may be some benefit to increasing the Pump speed greater than 2:1 for large displacement engines turning below 7200 RPM. The factors used to determine the ideal drive ratio are engine displacement, engine RPM range, power enhancers such as Nitrous Oxide, supercharger or turbo charger, and the desired level of vacuum.
Due to the high efficiency rate of the STAR Machine Pump, a drive ratio slower than 2:1 will provide better results on high RPM applications. Excessive Pump speeds that develop excessive levels of vacuum could be detrimental. Although slower Pump speeds will alleviate this condition, it could create a disadvantage at low RPM’s, especially in cars using automatic transmissions. Call STAR Machine for recommendations. The maximum recommended pump speed is 4500 RPM. STAR Machine recommends the use of a vacuum regulator on wet sump engines to address this condition. All STAR Machine vacuum pumps with a regulator installed are factory set to 12" Hg at 3500 pump speed.
PLUMBING THE PUMP
The Pump is supplied with -12 A/N fittings. The same considerations should be given to plumbing the Vacuum Pump as you would when plumbing your fuel system. Keep the hose lengths as short as possible. Avoid right angle fittings where possible. Free flowing, large radius bends are best. Use hose and fittings with a minimum I.D. of .65”. We recommend, and the Pump is designed for .75” I.D. hose on the intake AND exhaust. The use of springs inside of a hose to prevent from collapsing will disrupt airflow and may become loose and be drawn into the Pump. We recommend (and have available) a see-thru hose designed specifically for high vacuum systems. This hose is a lightweight and inexpensive alternative to braided hose, contains a larger internal diameter for more flow and will give you a visual indication if oil is being drawn into the Pump.
OPTIMIZING PERFORMANCE
The most overlooked aspect of successful crankcase vacuum is excessive leakage due to poor gaskets and seals and excessive blow-bye. The ideal drive ratio can NEVER be achieved if excess pump speed is necessary to overcome leaks. Even the most careful engine assemblers can take for granted areas they never thought to be a problem. Pressure testing the engine for leakage must be done if optimum results are to be realized. Unlike fuel or coolant leaks that are obvious to the eye, vacuum leaks are not visible and consequently assumed to be nonexistent. See our website for more specific information.
*THINGS TO AVOID*
OIL IN THE PUMP:
The Pump is a “OIL-LESS” design, which requires NO LUBRICATION for operation. Oil in the Pump will not damage the Pump, however it will reduce its performance. The dryer you can keep this Pump, the better it will work! The use of a baffle is mandatory! This may require several modifications to the location and design of the baffle you draw vacuum from. How will you know if oil is in the pump? If you use clear hose and the hose shows signs of oil in it, the oil will be in the Pump also. If you remove the belt from the Pump and spin it by hand and you do not hear the vanes tapping (as they are flung from the rotor) you have oil in the Pump. To clean the oil from the Pump, remove the hose from the intake side of the Pump and spray nonflammable (environmentally safe) solvent into the intake tube with the engine running. Mind the Pump exhaust when doing this! You should make this part of your usual race car maintenance. Excessive oil in the pump and low vacuum are usually an indication of a failed seal, gasket or ring issues.
DIRT IN THE PUMP:
During installation and storage use the caps supplied to cover the intake and exhaust tubes.
TOUCHING THE PUMP AFTER A RUN:
As a result of friction, heated intake air and the compression of the air within the Pump, it will be very hot
ARTIFICALLY COOLING THE PUMP:
ALLOW THE PUMP TO COOL NATURALLY
Do not blow air, place ice packs or pour water on the Pump to cool it.
NEVER PLACE OBJECTS IN THE INT. OR EXH. PORTS WHILE THE PUMP IS RUNNING
( Especially your fingers)
Share


